DIY Applique Beret Kit
We love felt! We can't think of anything better than adding a little felt applique to a felt hat or wooly beret. If you have a Genevieve Rose Atelier DIY Applique Beret Kit here are some ideas to get your started with your beret personalization.
You will need your DIY kit, pen and paper and scissors.
If you don't have a DIY kit you can easily buy squares of crafting felt online or at a craft store. These applique ideas can also be added to any felt fedora or wooly beret you might want to spruce up.
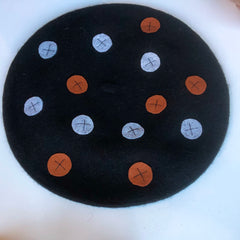
Felt Polka Dot Beret
For this applique idea we have used only 2 colors of felt.
Take a quarter coin or similar size circle, place on the felt and trace around with a pen.

Cut out each little felt circle.
One at a time, place each circle on the beret (be sure the pen marks are facing the beret so they can't be seen).
Thread your needle and tie a knot in the end of the thread. 

Sew on each felt dot with a large cross. Instead of trying to hide the stitching we like making a feature of the thread by using a contrasting color and large cross shape.
If you feel more comfortable you can pin each dot in place on the beret before sewing it down.
There's no need to cut and knot the thread after sewing each dot, just continue sewing the next one. The big lines of thread will be hidden on the underside of the beret. But do knot and cut the thread after sewing on the last dot.
Of course, if you prefer, you can knot and cut the thread after sewing on each dot.
(The dots can be glued onto the beret but they will stay attached much, much better if they are sewn on). 
Applique Felt Initials
We wanted to make our initials the full height of the felt squares so we first traced the felt on a piece of paper (to make sure the letters fit).

Draw your initials as tall and wide as you like on the paper and cut them out.

Place the letters UPSIDE DOWN on the felt - this ensures the pen marks we're about to make won't be visible on the letters. 

Trace around the letters and cut them out. 

To cut out the center bits of letters like A, R, B, D etc fold the letter in half, make a little snip in the center bit and then cut out and remove the center portion. 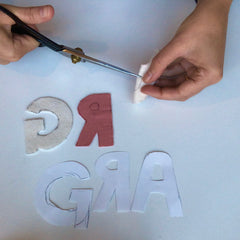

Turn your letters the right side up (notice the pen marks are now on the bottom where they can't be seen).
Pin the letters to the beret.

Thread your needle and tie a knot in the end of the thread.
Sew the letter onto the beret. Instead of hiding the stitching we like to make a feature of it by using a contrasting thread color and using big visible stitches.
If you feel more comfortable pin one letter at a time, using several pins on the same letter.
(The letters can be glued onto the beret but they will stay attached much, much better if they are sewn on). 

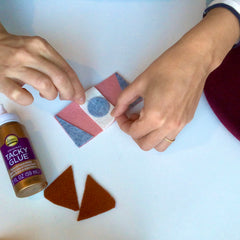
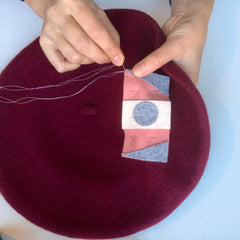
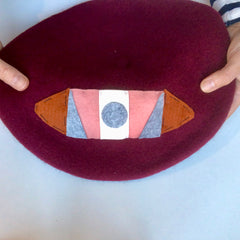
Art Deco Inspired Geometric Panel
Release your inner designer with this free-form style.
We invented a panel of geometric shapes in contrasting felt colors.
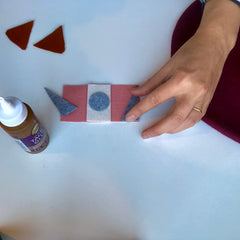
Cut out and arrange your pattern before glueing or sewing anything.
It helps to take a photo of your design before glueing or sewing in case you forget how you wanted it to look (we have learned this the hard way!)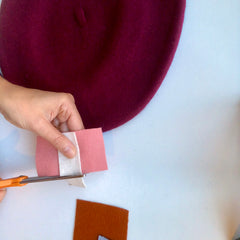

Cut the tip off your glue. Glue each piece onto the base panel, one at a time.
When you have finished glueing leave the whole panel to dry. 

When dry, pin the panel onto the beret.
Thread your needle and tie a knot in the end of the thread.
Sew around the whole panel, tying a knot in the thread at the end.
Instead of trying to hide the stitching we like to use a contrasting thread color and big stitches to make a feature of the sewing. 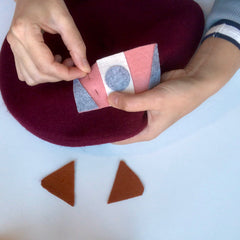
Pin and sew any remaining shapes onto the beret. These two little bronze triangles were not glued onto the main panel so we sewed them on separately.
(The panel can be glued onto the beret but it will stay attached much better if sewn on). 
If you enjoyed this applique felt project try one of our other DIY beret or headband kits, and don't forget to share your beret style @genevieveroseatelier
-
Genevieve Foddy
